


Guide & Instructions
Here you can find everything you need to know about Carholics QuickPlate Magnetic License plate holders.

Site Contents
Parts List
Parts List
Section 1. Contains the parts list, check the list and confirm you have all the parts before assembly.
Must know information
Must know information
Section 2. Contains all information you need to know and take into consideration with explanations.
If you have questions, send us email to markus@carholics.eu
Installation Guide
Installation Guide
Section 3. Contains complete guide for installation with pictures and video.
! BEFORE WE START !
Do not take out the magnets under the warranty sticker before actually starting the assembly.
They are fragile and very strong. If they collide with each other, they can break.
Always triple clean all surfaces thoroughly with brake clean or isopropyl alcohol.
The tapes won't stick permanently if the license plates has any grease or dirt on it.
SECTION 1.
This section provides detailed information about all the components included in the QuickPlate set.
Here, you'll find descriptions and purposes for each part, ensuring you have everything needed for a successful installation.

Box Contents
Each box contains all the necessary parts and optional accessories to install one license plate.
In the box you have your Counterparts, Magnets and Accessories.
**Be careful when taking out the round magnets from the package, they are super strong and fragile.
They literally want to go through each other.
Collapsible content
Parts List in English
Parts List in English
Package contains for 1 license plate!
1. Magnets 2pcs
2. Counter Magnets 2pcs
3. Stabilisators
5. Stainless steel screws:
- Torx 5x20mm Screw 2pcs
- Torx 6x20mm Screw 2pcs
- Torx M6x20mm Bolt 2pcs
6. Double sided tape for magnets
Osalistaus Suomeksi
Osalistaus Suomeksi
Paketin sisältö yhdelle rekisterikilvelle!
1. Magneetit 2kpl
2. Vasta Magneetit 2kpl
3. Kallistuksen estäjät 2kpl
5. Rosteri ruuvit:
- Torx 5x20mm Ruuvi 2kpl
- Torx 6x20mm Ruuvi 2kpl
- Torx M6x20mm Pultti 2kpl
6. 2 Puolinen teippi magneeteille

SECTION 2.
This section provides all the additional information you need for installing and using the QuickPlate. It includes essential tips and guidelines to ensure optimal performance and safety.
All questions can be sent to helpmebro@carholics.eu
At Your Own Risk.
While QuickPlate is a versatile and innovative product, please note that its installation and use are at your own risk.
We do not accept responsibility for any issues such as missing license plates, dislodged magnets, or broken parts during assembly.
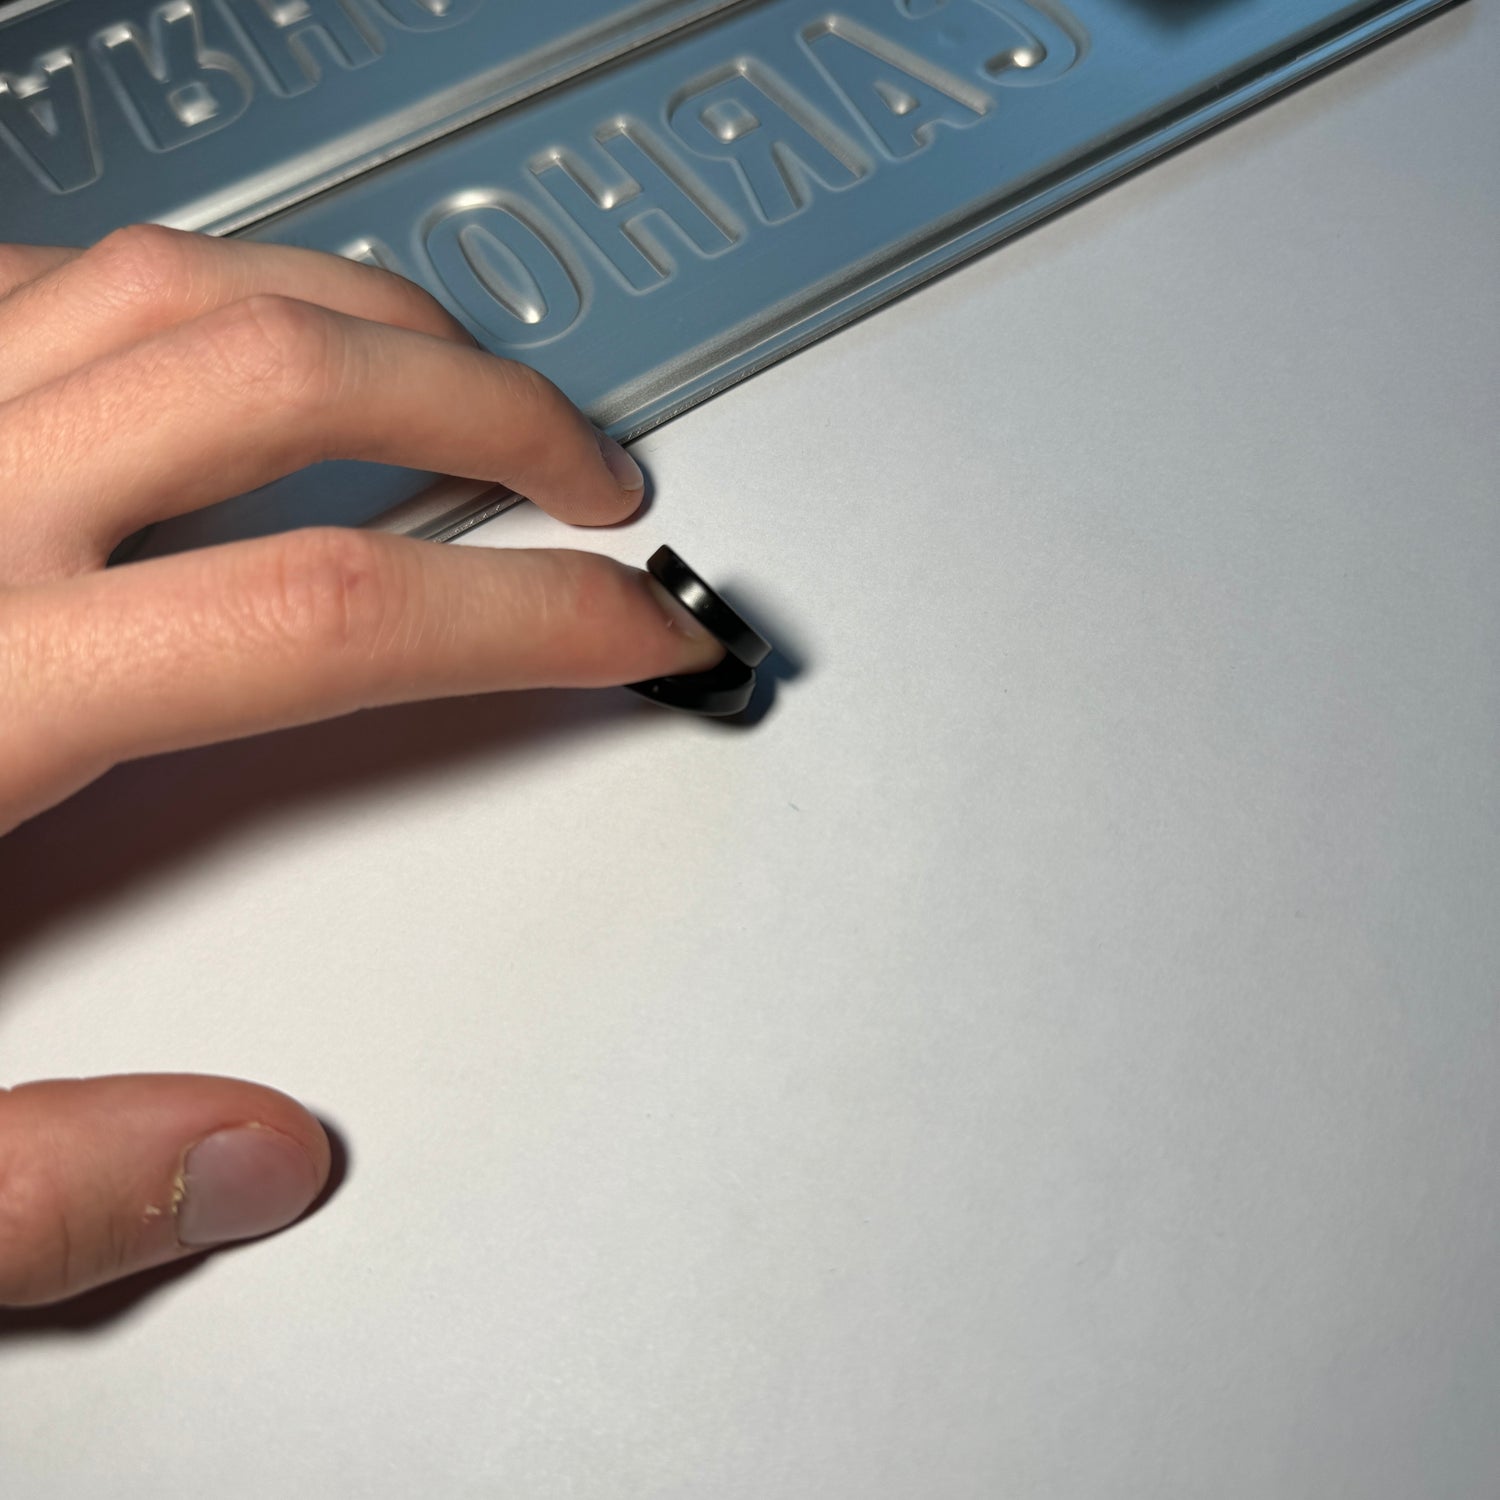
Be Careful!
The magnets are extremely strong, so it's important to handle them with care. Do not take them out from the box before installing.
Always keep them separated inside the box. When not in use, store them in the box provided.
Failure to handle the magnets carefully can lead to broken magnets or injuries, such as uncomfortable pinching, as shown in the photo.
SECTION 3.
This section provides a comprehensive step-by-step guide to installing your QuickPlate, ensuring a secure and professional finish.
Follow these instructions carefully to maximize the performance and durability of your QuickPlate Magnetic License Plate Holders.
INSTRUCTION GUIDE
You will get 4 different methods to assembly the Quickplate with.
- 5x20mm Screw
- 6x20mm Screw
- M6x20mm Bolt
- 3M VHB Double sided tape
To figure out which one is the correct and best way to install the kit with, you need to remove the register plates from the car and check if you have holes from screws or bolts.
Double sided tape is not recommended as permanent solution, because tape is not as secure as screws! We do not take any responsibility of lost magnets caused the improper installation or usage on double sided tape.
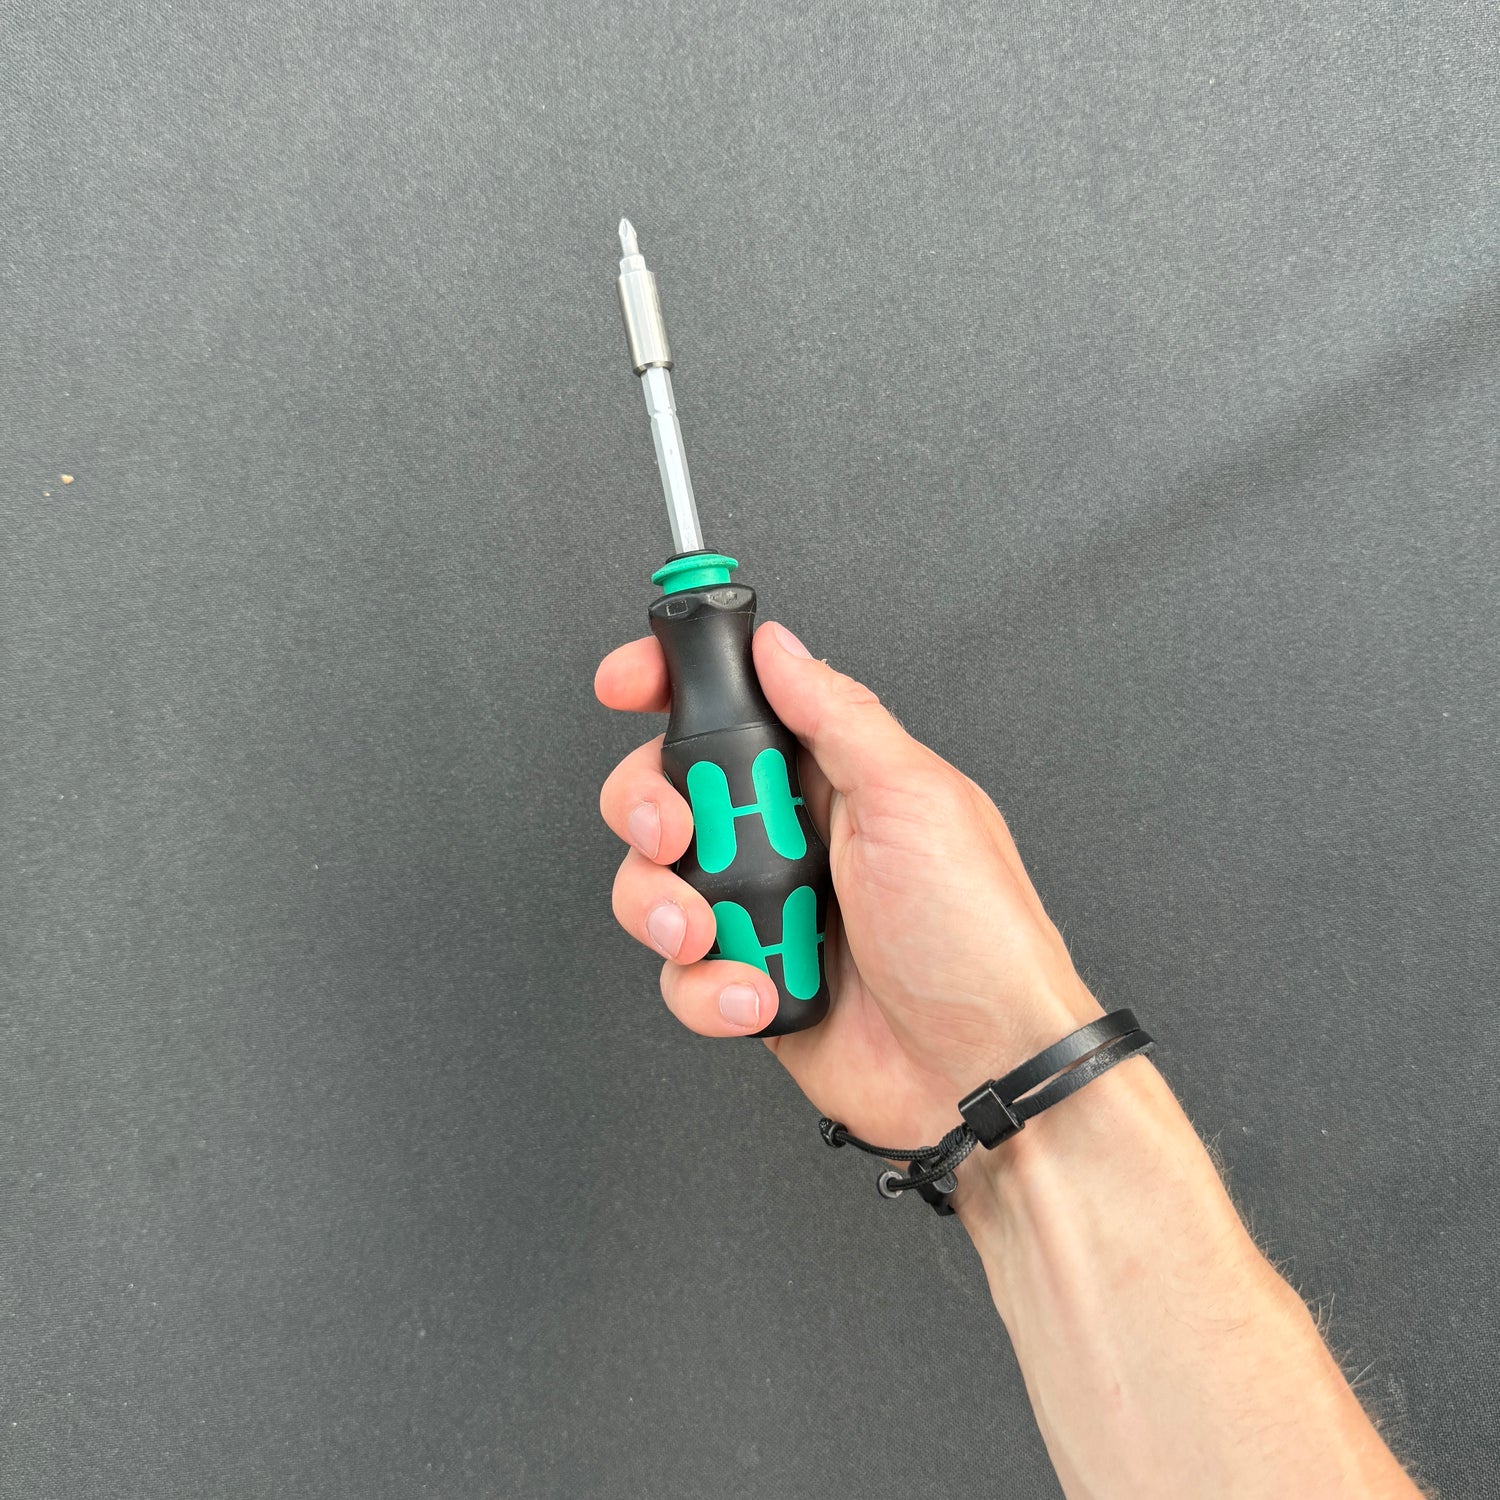
CORRECT TOOLS
Do not use ratchet! The magnets are super fragile and need to tighten with light hand strength or else they will break!
Maximum tightening force required is 3Nm!
Preparation Phase
Here you can find the assembly instructions with photos, video and text.
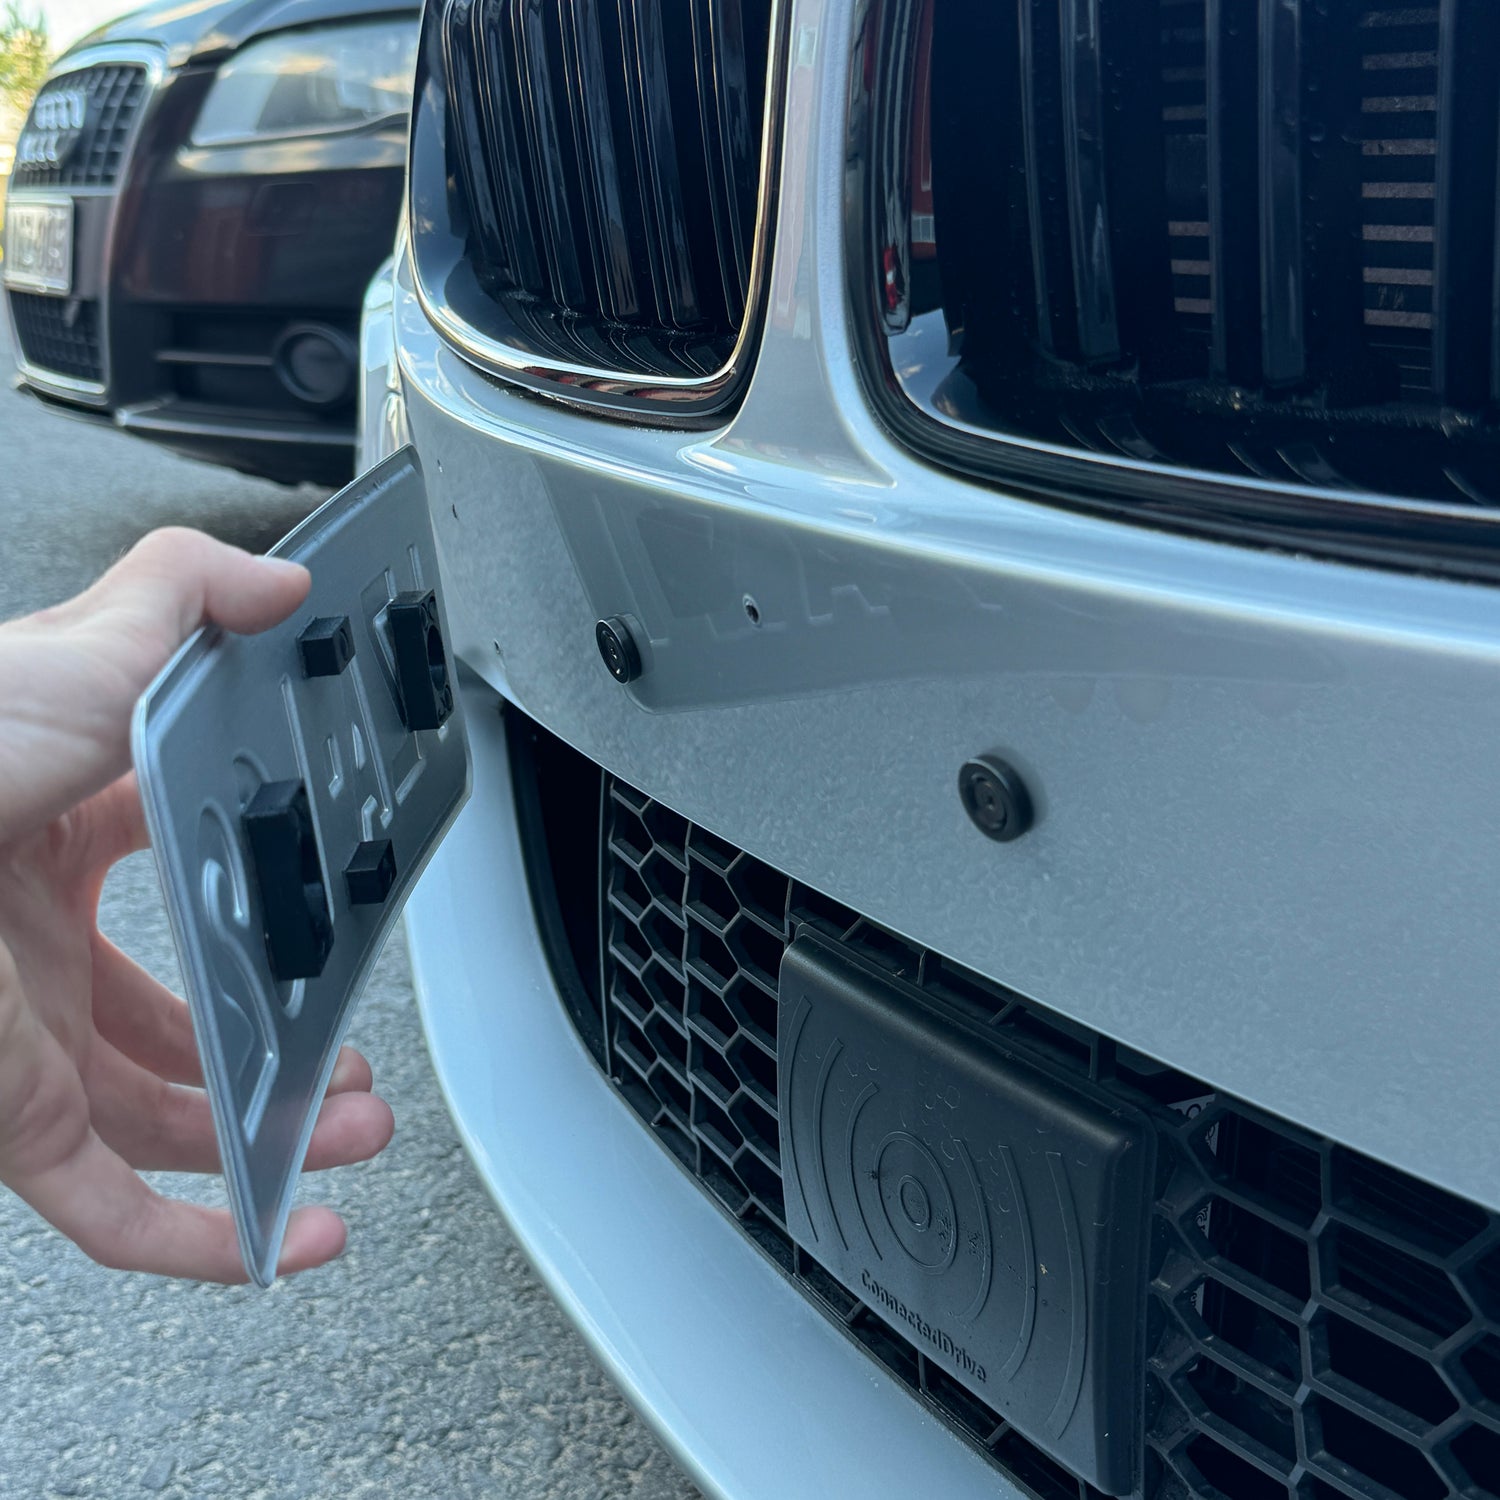
STEP 1.
REMOVE PLATES AND CLEAN UP
Remove your old license plates and the holders. Then clean the surface completely with alcohol to remove all grease.
**Always triple clean everything with brake clean or isopropyl alcohol.
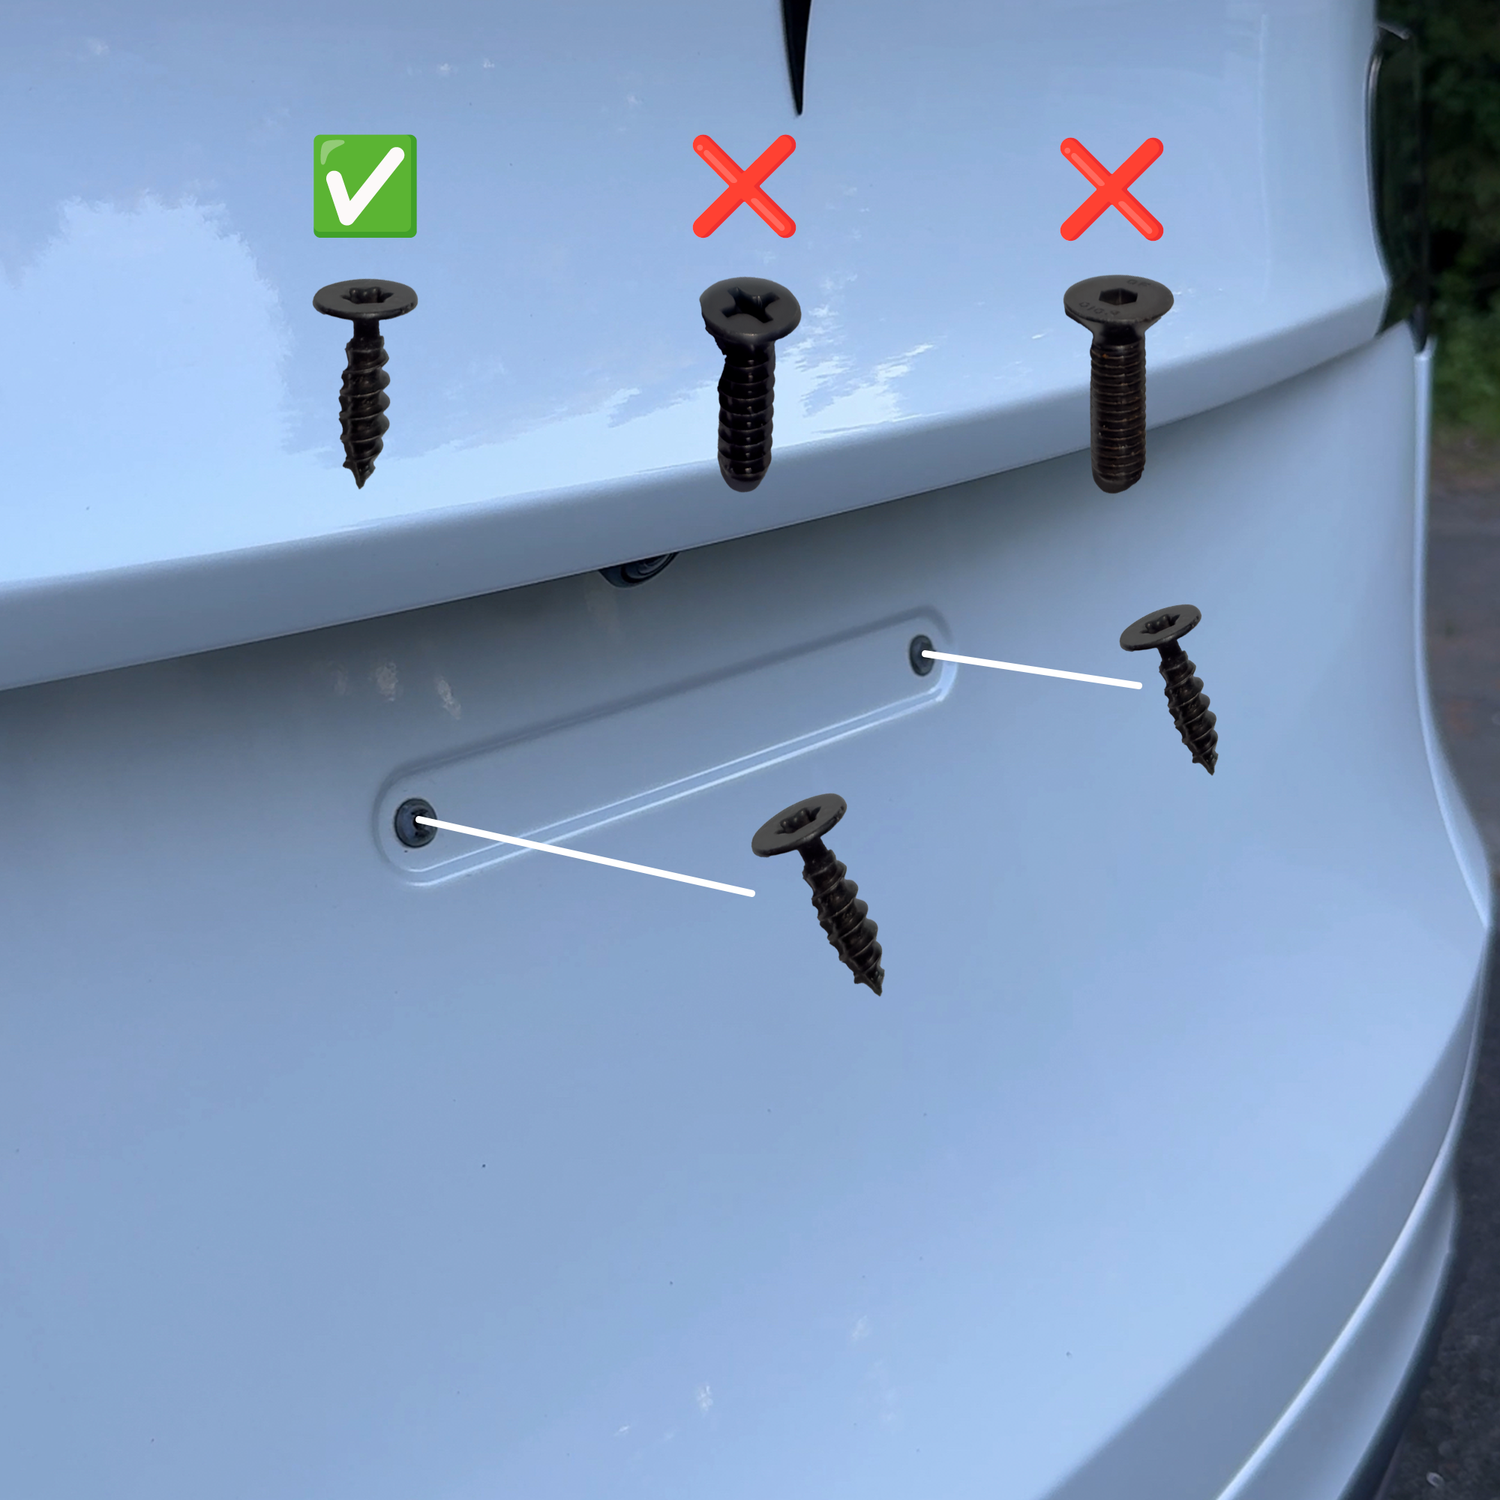
STEP 2.
TEST SCREWS AND BOLTS
Now test which screw you will use to install the kit, or use double sided tape. Remember that tape might not fully cure on top of ceramic coated paint.
Installation Phase
STEP 1.
SCREW & MAGNET
We recommend to put the screw through the magnet and screw them on together.
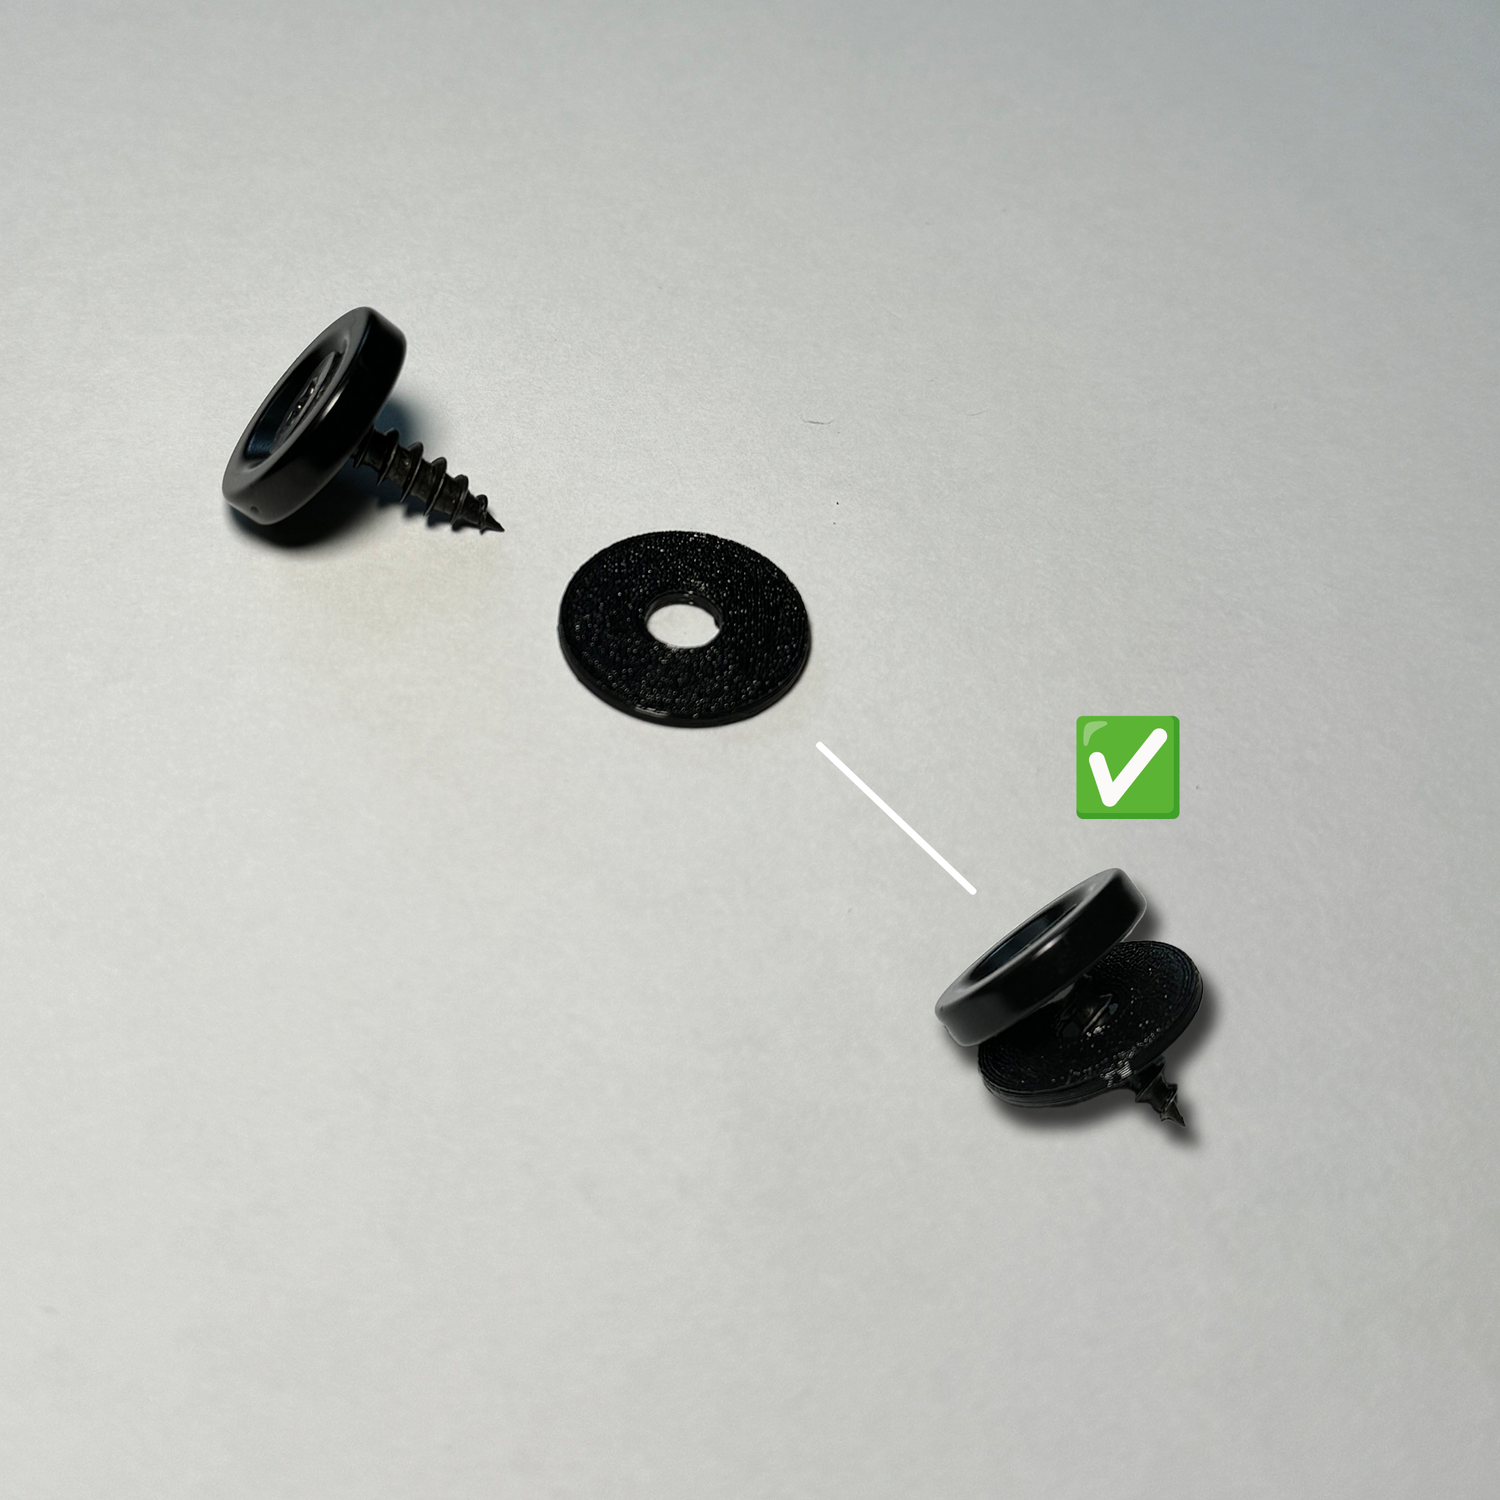
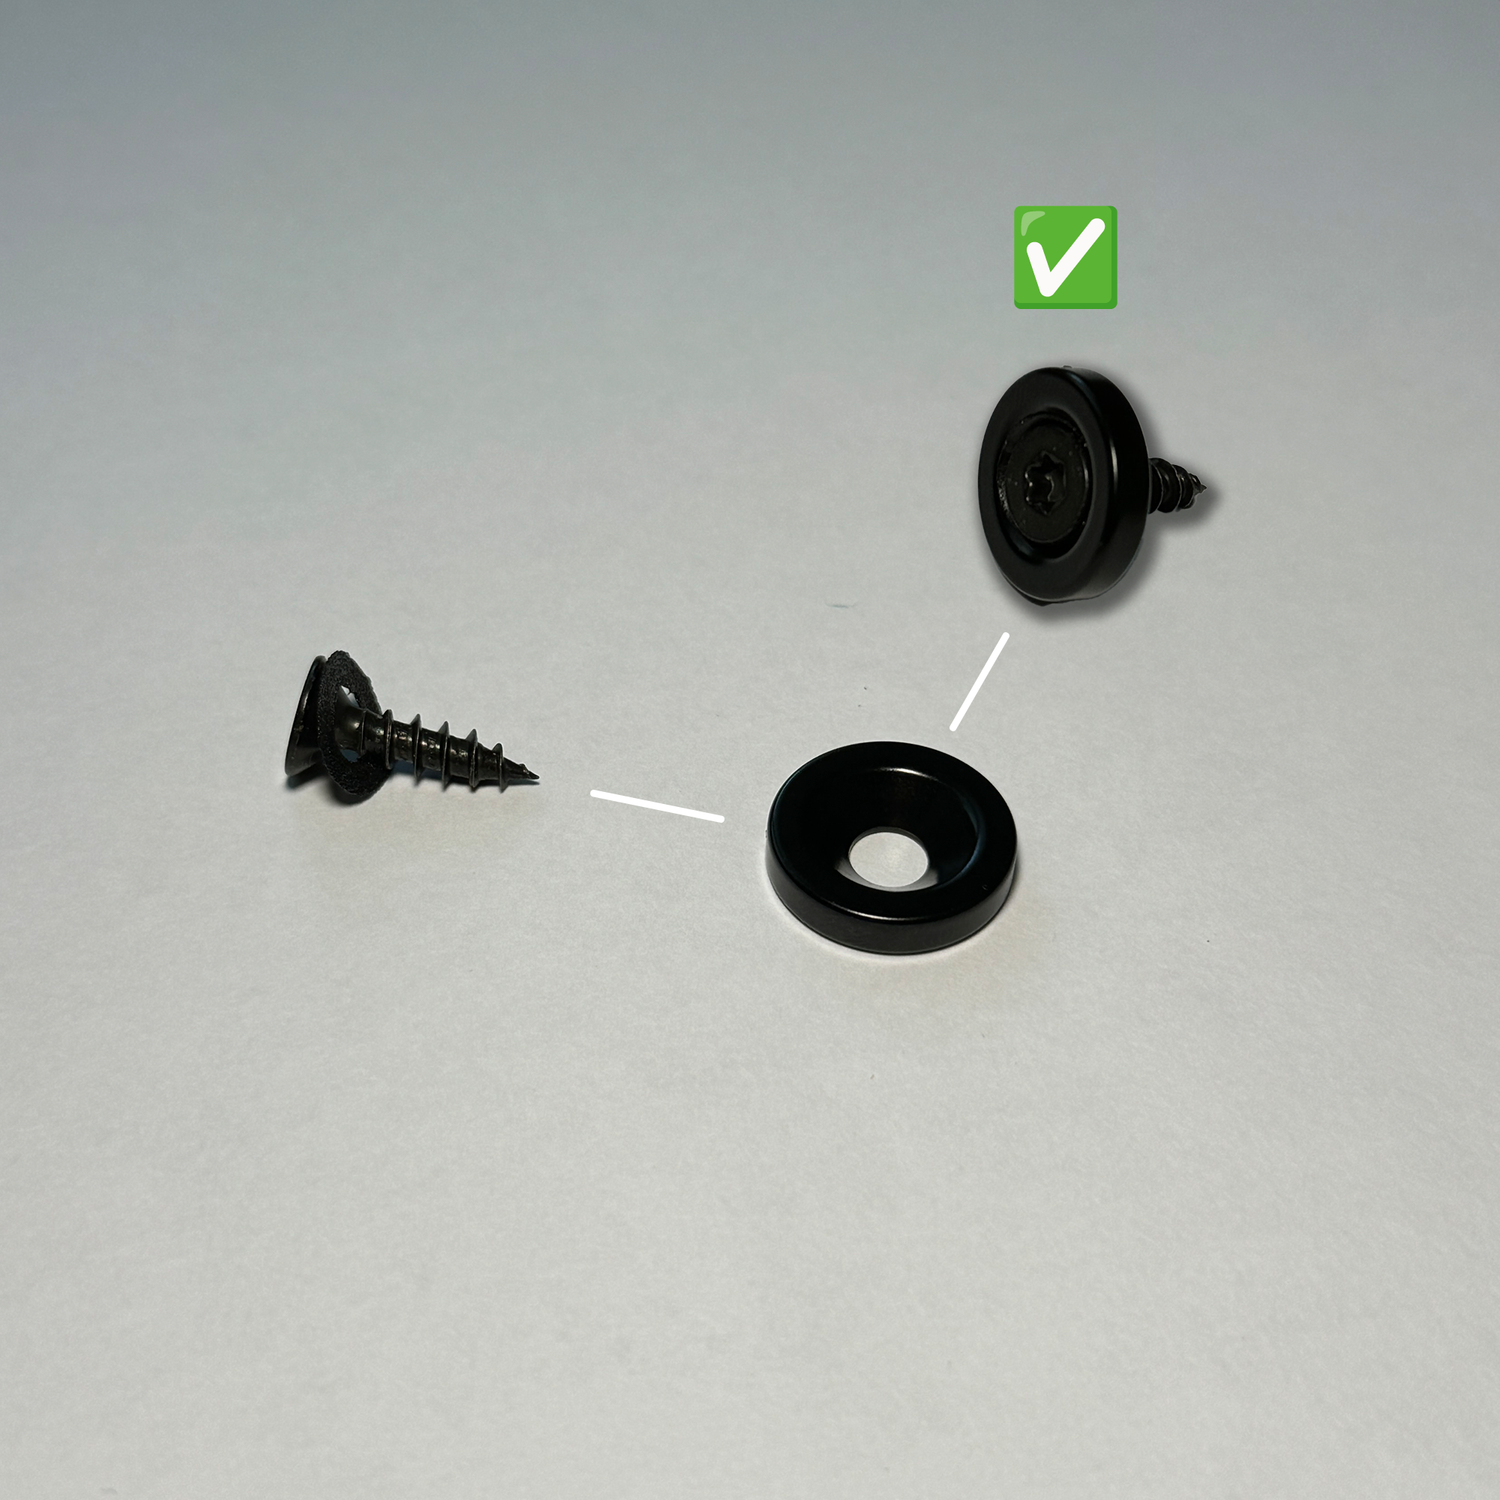
STEP 2.
INSERT SPACER
Insert the spacer of your choice under the magnet
You have total of 3 spacers available to use. Always use atleast one as the product is designed that way.
You can use the extra spacer to control how much the magnet sticks out.
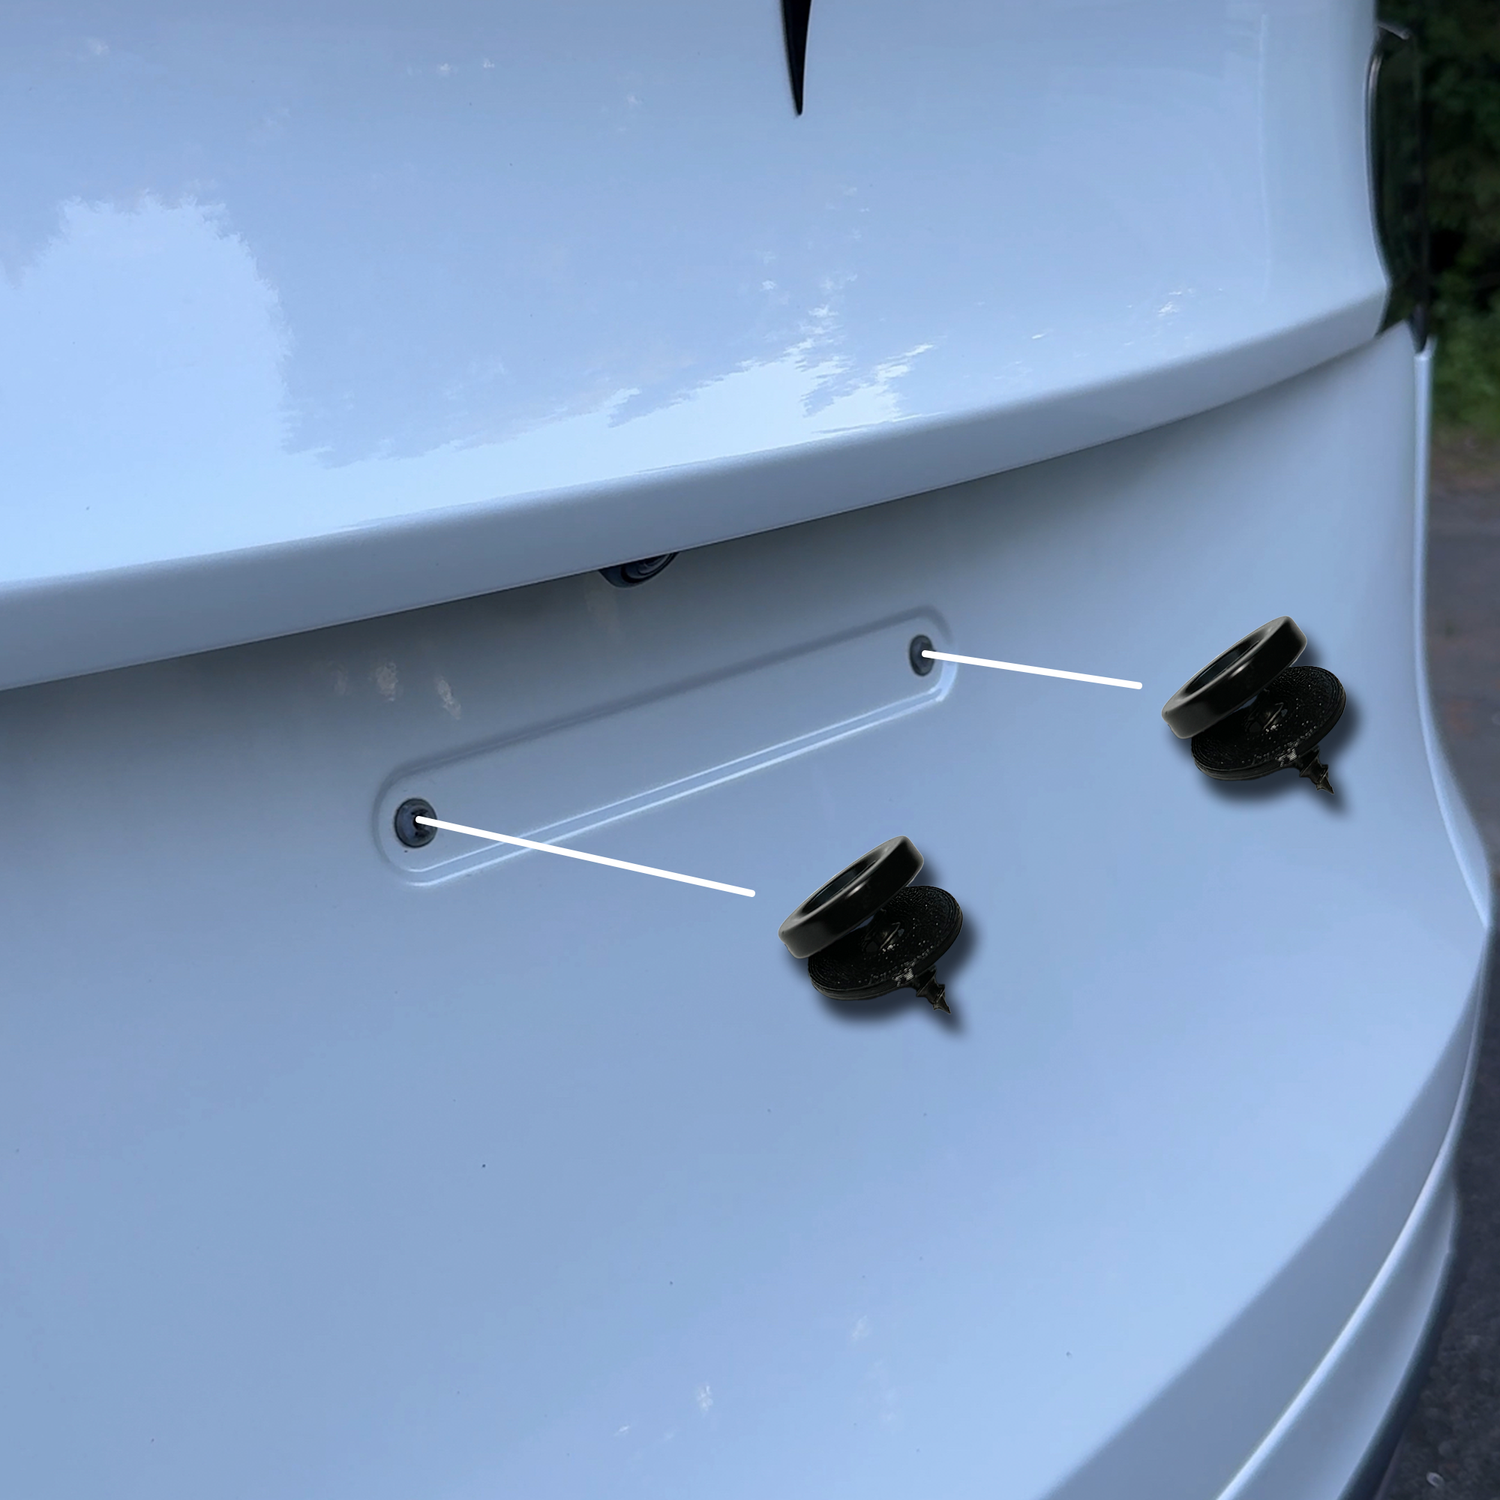
STEP 3.
INSTALL THE MAGNETS
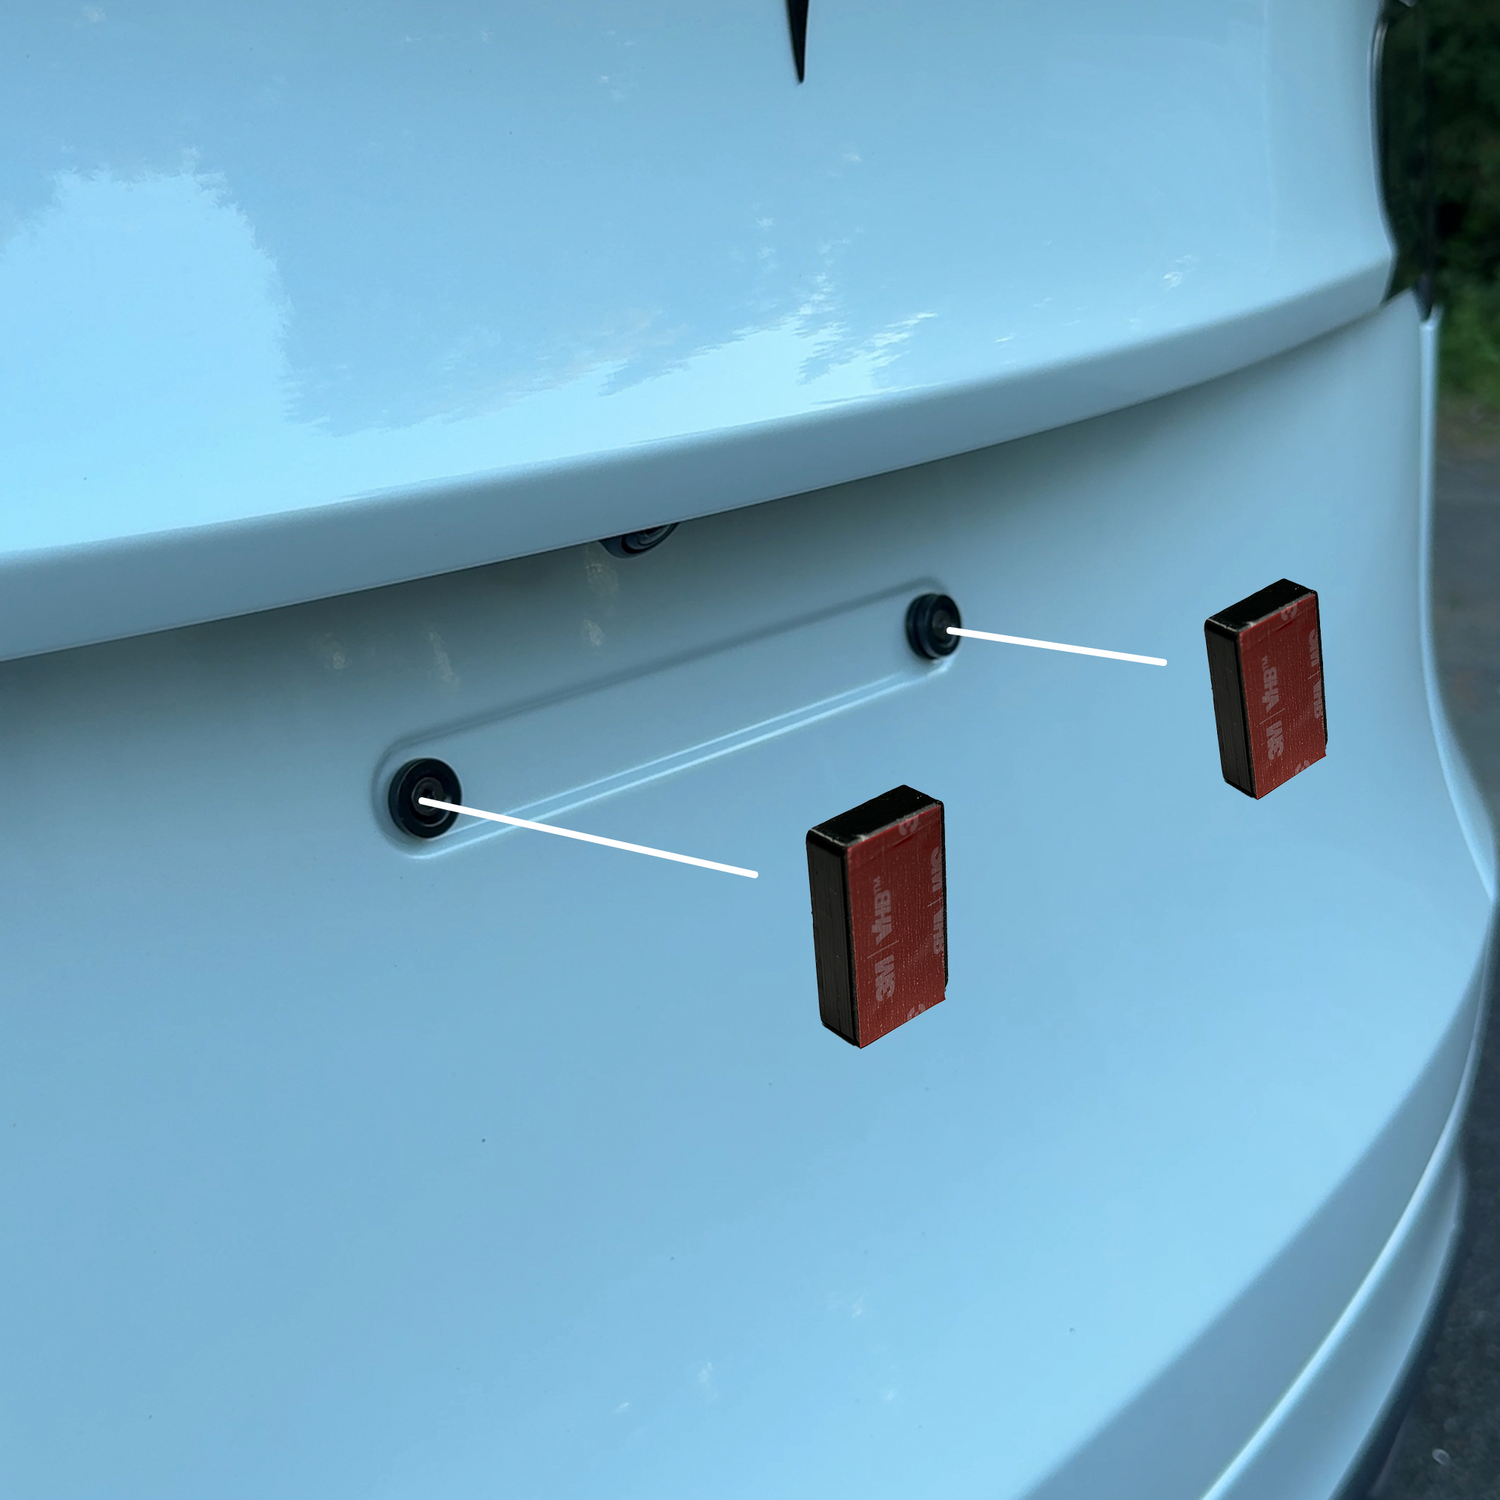
Now you can screw in the assembled magnet. Do not use ratchet. Only light hand strength, so the magnets won't break.
With double sided tape: Stick the magnet on to the double sided tape, then stick the magnet on top of the paint.
Always triple clean the magnet and the bumper with brake clean or isopropyl alcohol!
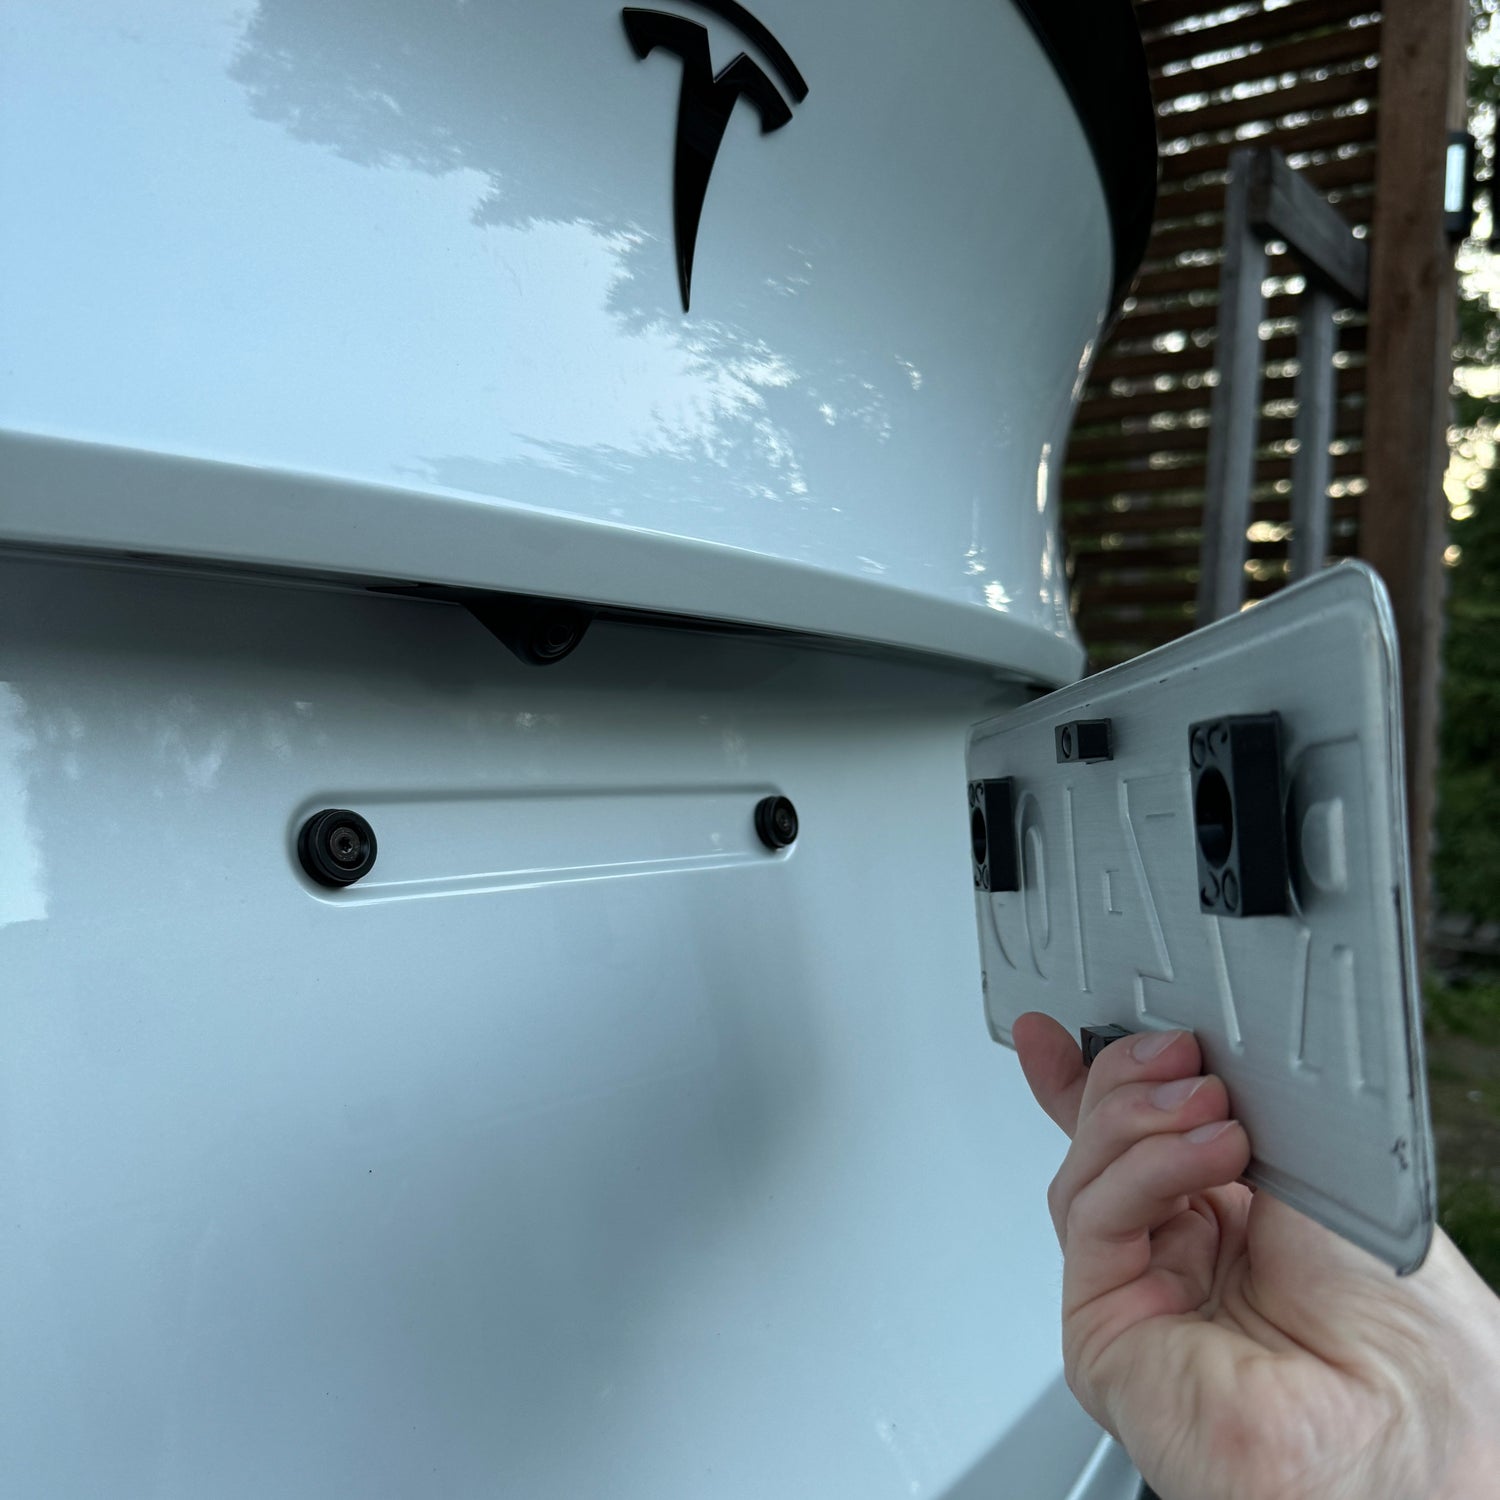
STEP 4.
THE COUNTERPARTS
Place the counterparts on top the magnets, and peel of the double sided tape from the back.
STEP 6.
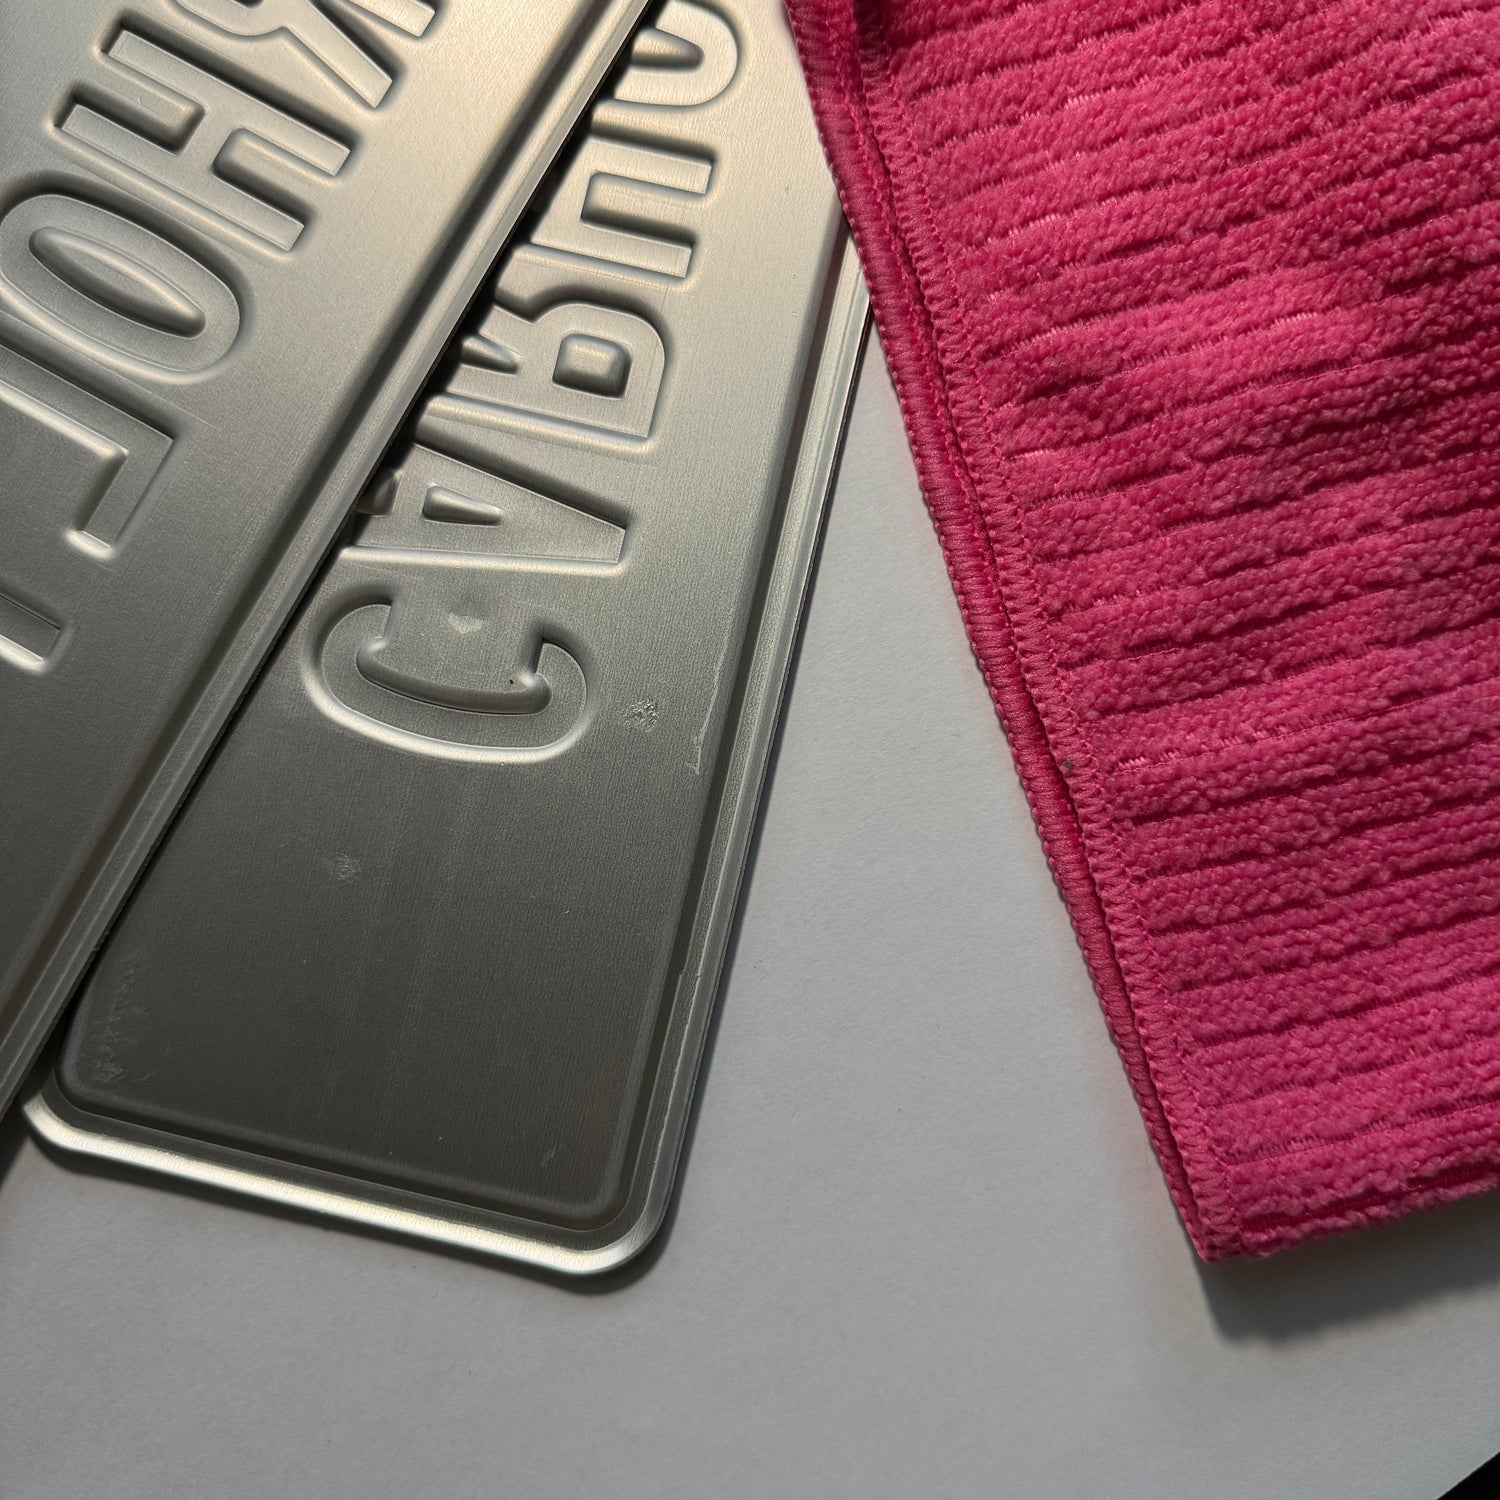
CLEAN THE PLATE
Before installing the license plates on top of the counterparts, make sure your license plate is fully clean.
We recommend clean atleast 3 times and to use isopropyl alcohol to kill all left residue.
STEP 7.
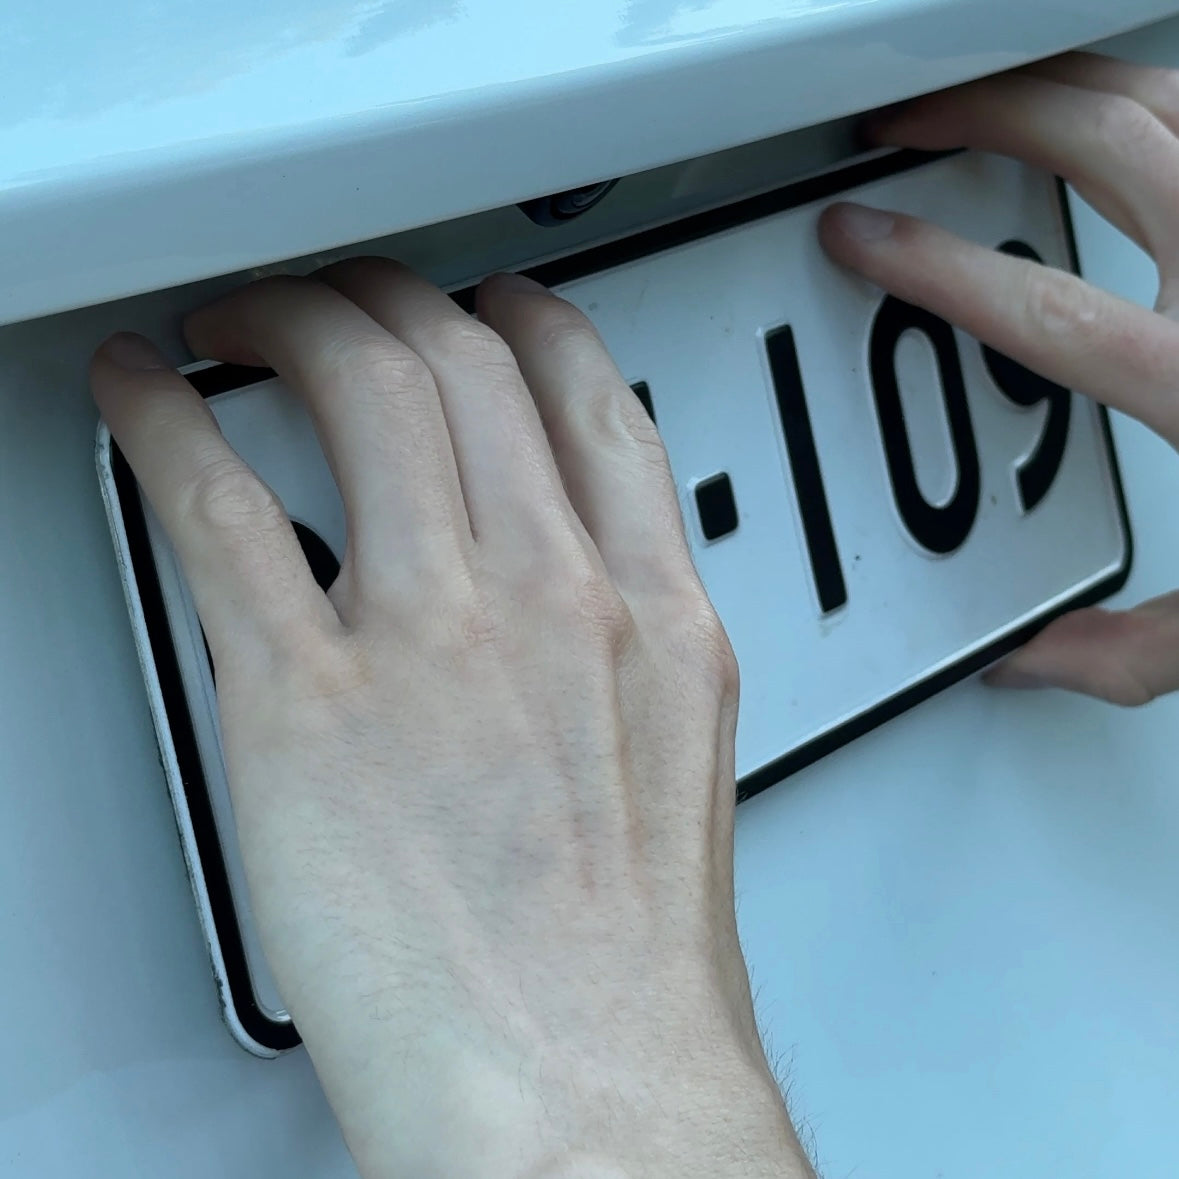
STICK THE PLATES ON
Mock up the plates placement before inserting the plate blindly, the double sided tape is very strong.
Press in the plates after mock up and secure my giving pressure.
Make sure to take the plates somewhere warm to cure.
3M VHB cures to 50% strength in 20 minutes, to 90% in 24 hours and to 100% strength in 72 hours.
STEP 8.
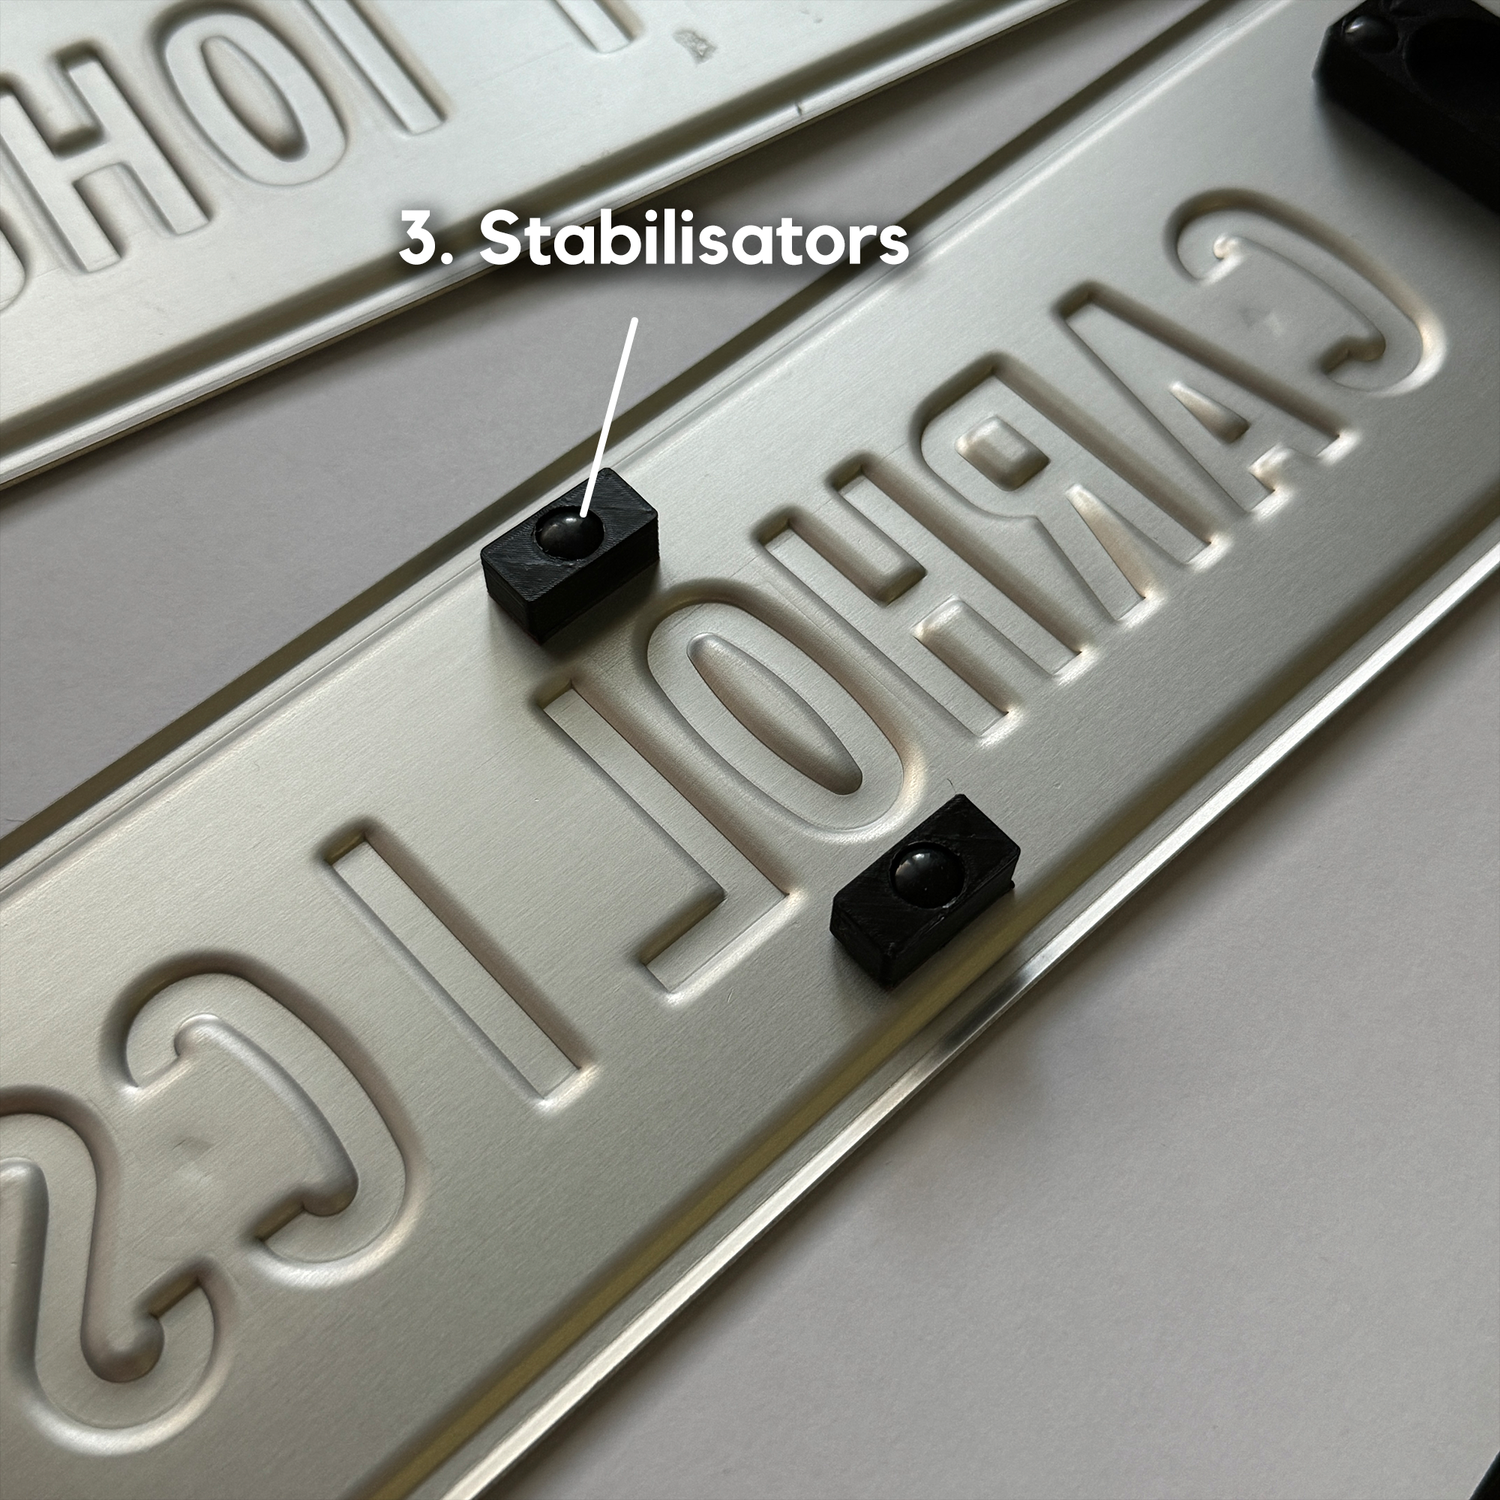
STABILISATORS
We recommend to use the stabilisators and place the onto the edges of the plates. This prevents any movement and secures the plates even more.
*Photo has the old version of the stabilisators.
Installation VIDeo
Here you can see a very good installation video our friend Wike @WikesJokes has made for you!
This is perfect example why QuickPlate is much better alternative for double sided tape.


QuickPlate Magnetic License Plate Holder
QuickPlate
88% OF OUR CUSTOMERS BUY 2 SETS
Couldn't load pickup availability


INSTALLATION COMPLETE!
Now you have successfully installed the Carholics Quickplate kit.